
Typical applications of the Min / Max detector I/O are glitch capturing and capturing intermittent signal changes. It can also be used as peak hold function.
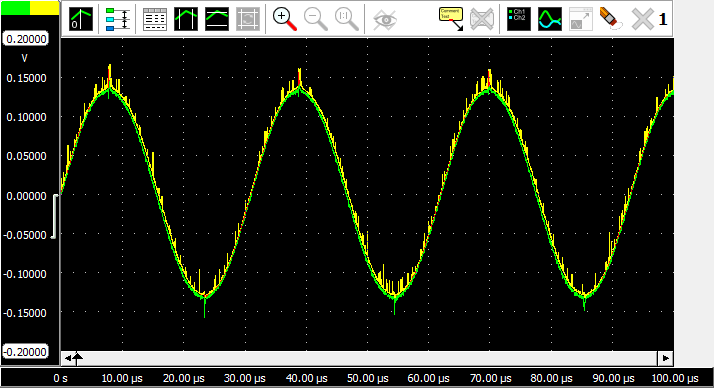
In the figure below, the spikes (maxima) in a sinusoidal signal (green) are detected by a Min / Max detector (yellow).
Properties and actions
To control the behavior of the Min / Max detector I/O, several properties are available.
These can be accessed through a popup menu which is shown when the I/O is right clicked in the Object screen.
The properties can also be accessed through its settings window which is shown when the I/O is double clicked in the Object screen.
To open the Object screen, click the  Show object screen button.
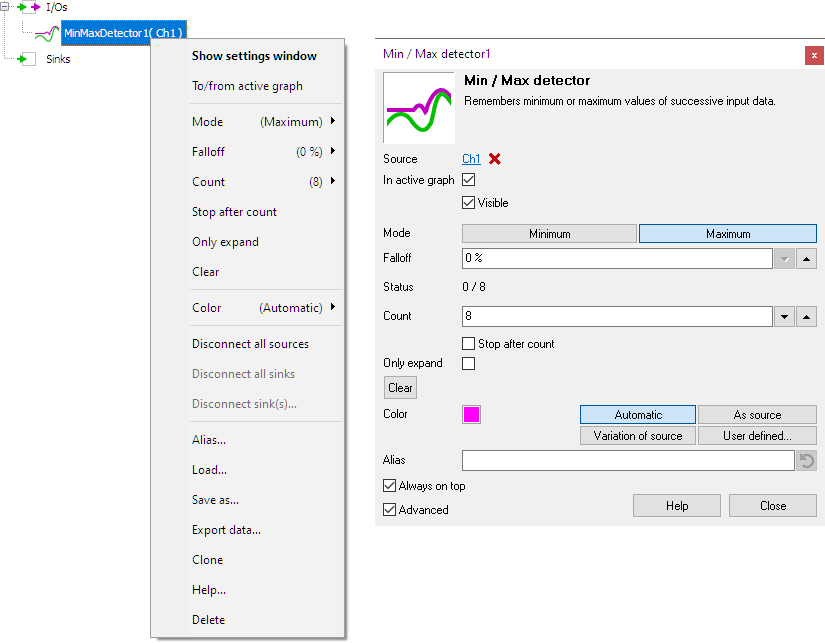
By default, the settings window only shows the most used settings. When Advanced is ticked, the extended window with all settings is shown. See also the program settings.
Minimum
When the Minimum property is set, the Min / Max detector I/O detects and keeps minimum values.
Maximum
When the Maximum property is set, the Min / Max detector I/O detects and keeps maximum values.
Fall-off
Optionally a Fall-off percentage can be set. If this percentage is not zero, the output will slowly fall back to the input signal. The higher the fall-off percentage, the faster the memory values of the detector will fall in the direction of the source values. The effect can be compared to a VU-meter with peak detect.
Count
The Count property determines how many measurements are processed. Several standard values are available, as well as a user defined setting.
Stop after count
When the Stop after count option is checked, the Min / Max detector I/O will stop processing data when Count measurements have been collected.
Only expand
When the Only expand property is set, the data size of the Min / Max detector I/O gets higher when the source's data size grows, but does not shrink when the source's data does. This can be useful when detecting minima or maxima of a source with varying data size.
Clear
The Min / Max detector I/O can be manually cleared with the Clear action. The data will be made equal to the data in its source.