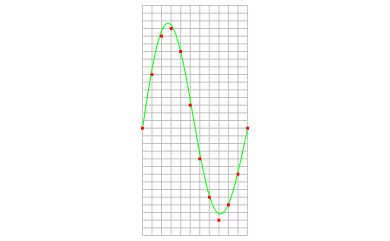
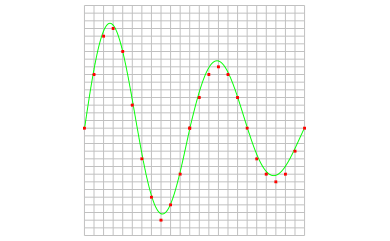
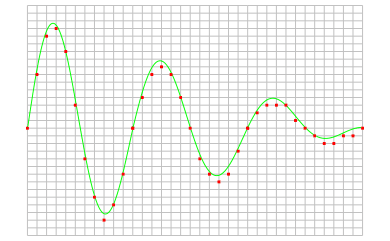
With a given sampling frequency, the number of samples that is taken determines the duration of the measurement. This number of samples is called record length. Increasing the record length, will increase the total measuring time. The result is that more of the measured signal is visible. In the images below, three measurements are displayed, one with a record length of 12 samples, one with 24 samples and one with 36 samples.
The total duration of a measurement can easily be calculated, using the sampling frequency and the record length:

Changing the record length of an instrument in the Multi Channel oscilloscope software can be done in various different ways:
-
Clicking the Record length indicator
 on the
instrument toolbar and selecting the required value from the popup menu.
on the
instrument toolbar and selecting the required value from the popup menu.
-
Opening the instrument settings dialog using the
 Instrument settings dialog button and selecting the required record length in the dialog.
-
Clicking the decrease/increase record length buttons
 and
and
 on the instrument toolbar.
- Using hotkeys F11 (shorter) and F12 (longer).
-
Clicking the Record length label in the combined Record length + Sample frequency + Resolution indicator
 on the instrument toolbar and selecting the required value from the popup menu.
- Right-clicking the horizontal scrollbar under the graph displaying signals from the instrument and selecting Record length and then the appropriate value in the popup menu.
- Right-clicking the instrument in the Object screen, selecting Record length and then the appropriate value in the popup menu.
Information:
Depending on the instrument settings, the instrument can have certain limitations with respect to the available record lengths.
When a user defined value is requested that is not available, the software will use the closest available value.